


FAQs
Fotile provides answers to common questions regarding the use of its various product series.
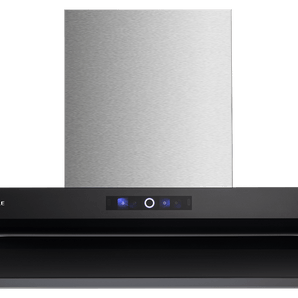
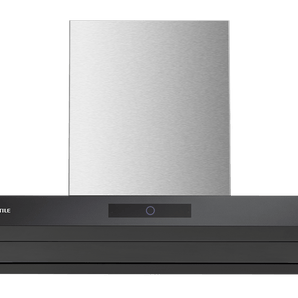
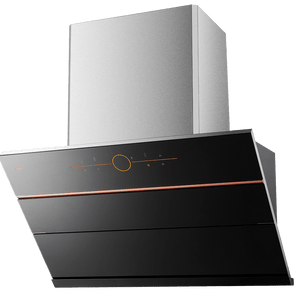
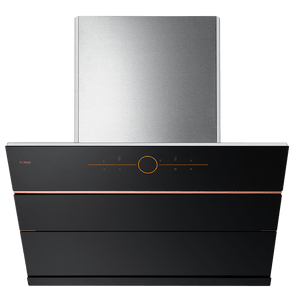
Range Hoods
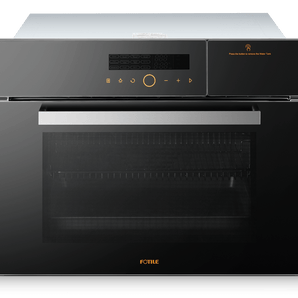
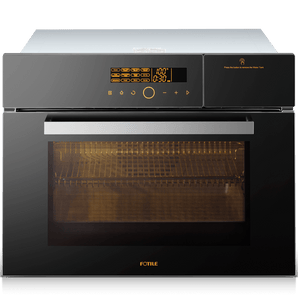
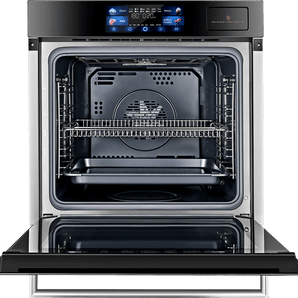
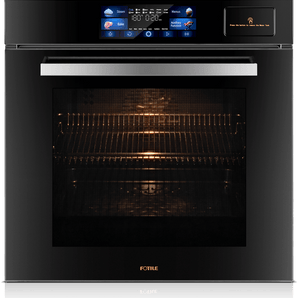
Steam Ovens
Dishwashers
煮食爐
Range Hoods
Installation Length and Angle Requirements for Range Hood Ducts
Factors affecting duct pressure include the total length of the duct, the number of elbows, the degree of curvature, and area changes. To ensure the effective suction of the range hood, the total duct length should not exceed 5 meters, and the number of elbows should not exceed 3. Both conditions must be met; otherwise, the suction and performance of the range hood may be affected.
Installation Location for Range Hood Socket
- Prioritize installation above the false ceiling for safety and aesthetics.
- The socket should be more than 1.5 meters away from the center of the cooking surface.
Installation Conditions for Range Hoods
- Exhaust Hole Preparation: The exhaust duct opening should be a circular hole with a diameter of 165-180 mm. Specific opening details should be confirmed with the installation technician based on the model of the range hood.
- Reserved 10A Power Socket: Ensure the location of the power socket meets safety requirements for normal operation of the range hood.
Wall Thickness Requirements for Range Hood Installation
When installing the range hood, consider the wall’s load-bearing capacity. For concrete block walls, drilling directly for installation is acceptable. However, for hollow walls, the solid layer thickness of the hollow board must be greater than 30 mm, and the overall wall thickness must exceed 80 mm.
Smart Ventilation Function of the Range Hood / Air Butler Function Gas Detection
The smart ventilation function can detect various gases, including formaldehyde, ammonia, carbon monoxide, benzene, cigarette smoke, alcohol, and hydrogen, among other irritant gases.
No Oil in the Oil Cup After Using the Range Hood for a Period?
If there is no oil in the oil cup after using the range hood for some time, it may be related to the type of oil and usage conditions. The oil channel in the FOTILE range hood is relatively long, and easily condensible oil may solidify in the channel instead of reaching the cup. Additionally, the frequency of use and the amount of oil used at home will also affect oil collection. This condition does not affect the normal use of the product.
What is the Required Amperage for the Range Hood Power Socket?
The power socket for the range hood needs to be a 10A socket to ensure normal operation and safe use.
Where is the Product Model Label Located on the Range Hood?
The location of the product model label on the range hood varies by model. For side-suction and European-style hoods, the label is usually located at the top of the left side casing.
Does the Length of the Exhaust Duct Affect the Airflow of the Range Hood?
The longer the duct, the greater the pressure loss, which can reduce suction power.
What is the Function of the Automatic Cruise Boost Feature?
The automatic cruise boost function is designed for situations with high duct resistance and poor smoke exhaust. When activated, the range hood can automatically detect duct resistance; when the external discharge resistance increases, the fan will switch to boost mode to help exhaust smoke smoothly.
What is the Diameter of the FOTILE Range Hood Duct?
The duct diameter of the FOTILE range hood is 165-180 mm (specific details vary by model; please consult the installation technician for requirements). If the duct diameter is less than 165-180 mm, it will affect the smoking effect and may produce noise.
Why Install Cabinets Before Installing the Range Hood?
- To prevent uneven installation of the range hood: Installing the cabinets first ensures the level and stability of the range hood installation.
- To avoid damage: Installing the cabinets first prevents collisions and dust or wood chips from falling into the range hood, which could affect its normal operation.
- To facilitate future maintenance: This approach avoids difficulties when disassembling the range hood later.
Should the Protective Film on the Surface of the Range Hood be Removed?
After installing the range hood, all protective films on the surface should be removed immediately. Waiting until after some time to remove them may cause the surface color to become uneven. Additionally, the adhesive from the protective film may remain on the stainless steel surface, making it difficult to clean.
Can I Disassemble the Range Hood Myself for Cleaning?
The range hood has a complex structure, and to avoid damaging the unit during disassembly, do not attempt to clean it yourself. It is recommended to have a professional handle such operations.
What Should Be Noted for Daily Cleaning and Maintenance of the Range Hood?
- Maintain Airflow: Ensure good airflow in the kitchen while using the range hood. Clean the surface of the range hood promptly after cooking and perform regular cleanings to effectively prevent oil drips and leaks.
- Choose Appropriate Cleaning Tools: Do not use rough tools like scouring pads, steel wool, or hard brushes; instead, use a soft cloth.
- Use Suitable Cleaning Agents: Avoid strong acids or strong alkalis; choose a neutral cleaner. It is recommended to clean the oil mesh and other accessories every three months.
Daily Maintenance Tips for the Range Hood
- Clean the Oil Cup: Before placing the oil cup, add a little water and detergent to make it easier to clean.
- Remove Stainless Steel Fingerprints: Use white spirit to easily remove fingerprints from the stainless steel surface.
- Remove Yellow Stains: Use a damp towel dipped in a small amount of gypsum powder (old powder) for cleaning; this powder is usually available at paint stores.
Steam Ovens
Daily Cleaning Recommendations for the Steam Oven
- Steaming Tray, Baking Tray, and Cooking Containers: Clean and dry them promptly after each use.
- Steam Oven Panel and Shell: Clean with hot water and a small amount of cleaning liquid, then wipe dry with a soft cloth (for stainless steel panels, wipe along the "grain" direction). Do not use alkaline, soda, acid, or chlorine-based cleaners, as well as corrosive cleaners, hard brushes, scouring pads, or steel wool, as they can corrode or scratch the surface.
- Interior Walls of the Steam Oven: Clean the interior after each use. Use a soft cloth and a mild cleaner with warm water to wipe away any condensation on the inner walls. In areas with poor water quality, white deposits may form on the inner walls; these can be wiped away with a damp cloth and a small amount of vinegar, followed by drying with a clean cloth.
- Water Tank: Empty and dry the water tank after each use.
- Side Racks: Detach the side racks first, then clean them as per the above method.
What is the Normal Preheating Time for the Steam Oven?
Under conditions of 25°C±3°C with an initial water temperature of 20°C±3°C, when the steam oven is filled to the maximum water mark and heated from the initial temperature to 100°C under no-load conditions, the preheating time is 5-10 minutes.
What to Do If the Steam Oven Has an Odor?
When the steam oven is first used, it may emit odors (such as the smell of silicone). This is due to the silicone used for sealing and the airtight packaging, which is normal, so please use it with confidence. The following methods can help reduce odors:
- Before the first use, you can add a pot of water and run a normal steaming cycle for 10 minutes before using it.
- It is recommended to open the door after each use to allow steam to escape and use an absorbent sponge to clean any accumulated water inside the oven. If there is still an odor, you can place some lemon water in the tank and run the steam oven for a while.
- If you plan not to use the machine for an extended period (e.g., going on vacation), thoroughly clean the machine first, then leave the steam oven door open to prevent odors.
What is the Difference in Temperature Setting at 100 Degrees in Different Modes?
At the same temperature, different modes will produce varying amounts of steam, affecting the rate of steam generation and heating speed, similar to different flame sizes on a stove. Different heating modes can impact the performance and efficiency of the steam oven.
Daily Usage Recommendations for the Steam Oven
- Use Perforated Steaming Trays: Place a baking tray on the bottom to catch grease and sauce, preventing them from dripping onto the inner tank. Do not place cooking utensils directly on the bottom of the inner tank.
- Avoid Frequent Door Opening: During the cooking process, do not open the door frequently to prevent heat loss, which may extend cooking time.
- Open the Door Safely: After cooking, stand to the side of the door, open it slightly to let out steam, and then open it fully to avoid burns from hot steam.
- Use Purified Water: It is recommended to use purified water each time, as other water types may produce scale during heating, affecting the heating efficiency and shortening the heater's lifespan.
Can Hot Water Be Added to the Water Tank?
To shorten the preheating time of the steam oven, you can add warm water directly to the tank, but it is not recommended to heat water directly. This is because if the pump is subjected to repeated impacts from 100°C water, it may degrade the pump's performance and affect its lifespan.
How to Clean the Water Tank of the Steam Oven?
After turning off the power, remove the water tank, fill it with about 60°C hot water up to the fill line. Then, add a packet of specialized cleaner to the tank and soak for 3-5 minutes (the longer the soak, the better the effect). Once the scale is completely dissolved, thoroughly rinse the inner walls of the tank twice. This completes the process of removing scale from the water tank.
What are the Installation Requirements for the Steam Oven?
A 10A socket and 2.5mm² electrical wire are required, with a distance of 45mm from the back of the kitchen cabinet. The cabinet should be heat-resistant to above 100°C and kept away from heat sources, gas pipes, ethanol, and other flammable materials.
How to Set the Steaming Time for Dumplings in the Steam Oven?
The 10-minute steaming time displayed on the menu is suitable for frozen dumplings or buns purchased from supermarkets. If the dumplings or buns are homemade, it is recommended to keep their sizes consistent and to extend the cooking time by 5-10 minutes as needed.
What is the Difference Between Preheating and Non-Preheating Food in the Steam Oven?
Depending on personal taste and preference, you can choose whether to place dishes in the oven after preheating. Dishes placed in the oven after preheating usually have better flavor, vibrant colors, and optimal moisture. Non-preheated dishes may cook faster, retain more moisture, and have darker colors.
What Techniques are Available for Using Steam for Fermentation?
- Temperature Setting: Set the temperature to 40°C and ferment for 50 minutes to 1 hour.
- Increase Temperature: If set to 45°C to 50°C, ferment for 30 to 40 minutes.
- Use Plastic Wrap: When placing containers in the steam oven or oven, seal them with plastic wrap. Just place them directly in the steam oven.
In spring and autumn, follow the above times for fermentation; in winter, it is recommended to increase the fermentation time by 2-5 minutes, as the room is cooler. In summer, as the room is warmer, fermentation can occur in the external environment without placing it in the steam oven or regular oven. If necessary, please follow the instructions for spring and autumn.
How Long Does the Fan Continue to Operate After the Steam Oven Stops Working?
The steam oven is equipped with a fan cooling function. After the steam oven's timer ends, the fan will continue to run for 20 minutes to lower the internal temperature. After 20 minutes, the fan will automatically stop.
What are the Tips for Steaming Vegetables in the Steam Oven?
Since the steam oven generates steam while cooking food, it is recommended to cover the containers with plastic wrap to ensure that the cooked dishes maintain balanced moisture, thus preserving their good flavor.
Dishwasher
What to Do If the Dishwasher Has an Odor?
If the dishwasher has an odor, it may be due to not being cleaned promptly. The following methods can help alleviate the smell:
- Clean food residues from the filter basket promptly after each use.
- It is recommended to regularly clean the interior of the machine (1-2 times a week) using the "Standard Wash" or "Cavity Cleaning" mode, leaving the door open to ensure ventilation.
How to Clean Limescale in the Dishwasher?
Limescale is primarily composed of calcium carbonate and magnesium hydroxide. Most household water will produce limescale upon heating, which is largely related to local water quality. Similar to using a kettle, limescale will accumulate at the bottom after frequent use. If limescale appears in the dishwasher, it is recommended to regularly use white vinegar or a specialized descaling cleaner for cleaning.
Daily Cleaning Recommendations for the Sink Dishwasher
The daily cleaning recommendations for the sink dishwasher are as follows:
Manual Cleaning:
- Filter Basket: Clean food residues from the filter basket promptly after each use to avoid affecting the next wash and causing odors.
- Panel and Door Glass: Use a sponge cloth dipped in hot water and a small amount of detergent to clean. After cleaning, wipe dry with a soft cloth. Avoid using scouring pads or metal objects to prevent scratching the surface.
- Spray Arms: Rotate counterclockwise to remove the spray arms, then take off the filter plate for cleaning. Do not use steel brushes or rough brushes to avoid scratching the tank. After cleaning, dry the tank with a sponge or cloth, ensuring that large residues (like bones) are not present in the dishes to avoid interfering with the spray arm rotation.
- Stainless Steel Tank: Add a suitable amount of neutral detergent. Avoid using strong bleach or other household chemicals to prevent corrosion of the tank. Rinse clean with water afterward.
- Gaps at the Door Connection: For non-removable parts, use a cotton swab dipped in sodium citrate (descaler for steam ovens) for cleaning.
- Rust and Mold Stains: If the tank shows "floating rust" or "mold stains," apply toothpaste to the rust and spots, then wipe clean with a cloth. Do not use scouring pads or abrasive materials to clean the tank.
- Cleaning Dishes and Vegetables: Do not place dishwashing liquid or foam-type cleaners inside the dishwasher.
Self-Cleaning of the Dishwasher:
- When cleaning, ensure the sink dishwasher is empty, then add an appropriate amount of dishwasher powder and select the standard wash mode (some models have a "Cavity Cleaning" function), allowing the dishwasher to enter "self-cleaning" mode. After about 30 minutes, the interior of the dishwasher will be cleaner.
- You can also use dishwasher cleaning tablets as needed to remove stubborn limescale and grease, helping to eliminate odors and improve cleaning effectiveness while extending lifespan.
Daily Usage Precautions for the Sink Dishwasher
- During daily use, do not leave lemons, sauces, pickles, mustard, or other high-salt or corrosive foods in the tank or on the panel for extended periods to prevent corrosion.
- After washing dishes, open the lid to dry, keeping a safe distance to avoid burns from hot steam. Open the door after 15 minutes to keep the interior of the dishwasher dry and clean.
- Do not leave low-carbon steel or cast iron cookware in the tank for long periods, and do not leave steel wool, rubber dishwashing pads, wet sponges, or other cleaning pads in the tank to avoid floating rust and mold stains.
- Avoid sharp and hard utensils like knives and forks from hitting the tank to prevent scratches, dents, or damage to the tank's appearance.
- When placing dishes, do not let fragile items like wine glasses touch other dishes.
How to Use Dishwasher Powder/Tablets
When using dishwasher powder, sprinkle an appropriate amount on the dishes after placing them. It is recommended to use 8g for regular cleaning; if there is heavy grease, you can increase it to 15g. For dishwasher tablets, place them in the filter basket.
Can Baking Soda and Food-grade Alkali Be Used in the Dishwasher?
Using baking soda and food-grade alkali in the dishwasher is not recommended, as long-term use can lead to yellowing of the stainless steel panel. It is advisable to use specialized dishwasher powder instead.
Can Dishwashing Liquid Be Used in the Dishwasher?
It is strictly prohibited to use dishwashing liquid or foam-type cleaners in the dishwasher, as excessive foam can affect the normal operation of the dishwasher. It is recommended to use specialized dishwasher powder.
Does High-Temperature Washing Affect Plastic Materials?
- The plastic components inside the sink dishwasher are made of heat-resistant materials that can be used at temperatures above 100°C.
- Some heat-sensitive disposable plastics should not be placed in the dishwasher for washing.
Will the Spray Arm Holes in the Dishwasher Clog?
The spray arm holes in the dishwasher are not easily clogged. The spray holes on the spray arm are designed with a convex shape to effectively avoid blockage. Even if the spray arm becomes clogged, it can be restored to normal by rinsing it with clean water after removal.
Can You Cut on the Dishwasher Panel?
You should not cut anything on the dishwasher panel, as it has a low load-bearing capacity and is easily scratched. Therefore, it is not advisable to place any items on it.
Poor Drying Performance of the Dishwasher
The following aspects can be checked and improved if the drying performance of the dishwasher is poor:
- Water Droplets/Vapor on Door or Bottom: This is normal, as drying primarily targets dishes. To achieve optimal drying results, it is recommended to open the door after the dishwasher finishes (when the screen no longer displays "00") to allow moisture to evaporate naturally, keeping the door and cavity dry.
- Dishes Not Drying: Check the washing mode used:
1. Gentle Wash, Super Quick Wash: In these modes, the final rinse temperature is lower, so residual heat drying or venting may not be as effective as in the intensive wash mode. It is recommended to choose the intensive wash mode.
2. Standard Wash, Heavy Wash: These modes typically dry most dishes effectively. However, for materials that dissipate heat quickly (like plastic, stainless steel, or wooden utensils), drying may be less effective due to slower evaporation compared to ceramic dishes.
Drying Methods of the Dishwasher
The drying method of the dishwasher primarily relies on residual heat to evaporate moisture.
Can the Dishwasher Wash Pans?
The dishwasher can wash pans, but it is not recommended for the following reasons:
- Especially for woks and cast iron pans heated directly over flames: Woks heated over flames may have ash that produces carcinogenic substances harmful to health; cleaning cast iron pans in the dishwasher may damage the cookware and affect its lifespan.
- If you must clean cookware, it is recommended to wash them separately and place them upside down, avoiding washing them with other dishes. Additionally, do not remove the dish rack to prevent blocking the spray arm's operation.
Is Ultrasound Harmful to Humans?
Ultrasound typically does not harm humans. When ultrasound propagates in water, cavitation occurs, forming millions of microscopic bubbles that cannot be seen with the naked eye. The explosion of these bubbles generates shockwaves that effectively remove stains and pesticide residues. The ultrasound in our dishwasher is similar to that emitted by bats and will not have any effect on the human body.
Does the Dishwasher Have an Ultrasonic Washing Mode?
The sink dishwasher does not use ultrasound for washing dishes; it is only used for washing fruits and vegetables.
What is the Frequency of the Dishwasher's Ultrasound?
Ultrasound is a sound wave with a frequency above 20,000 Hz. The ultrasound frequency we use is above this value, set for optimal cleaning effectiveness. However, the specific value is proprietary technology and cannot be disclosed at this time, but we can guarantee that this setting achieves the best cleaning results.
Residual Food Particles After Dishwasher Use
- Before placing dishes in the dishwasher, pre-clean the residues on the plates to ensure there are no excessive leftovers, reducing the amount of residue in the dishwasher.
- If there are still residues, there is no need for concern; simply check and clean the residues from the filter basket.
Does the Completion of the "Dishware Mode" Indicate That Drying is Finished?
The completion of the "Dishware Mode" (when the countdown display shows "00") does not mean that drying is complete. In fact, after washing, you need to wait another 20-30 minutes, during which the dishwasher is venting and using residual heat for drying. Once the display no longer shows "00," this indicates that the operation is complete, and you can then open the door.
Why Does the Dishwasher Take Longer Than Displayed Time?
The sink dishwasher's operation can be affected by environmental factors, such as water pressure, variations in inlet water temperature, and drainage conditions. Therefore, washing time may be extended, which is a normal occurrence.
Is There a Layer of Oil on the Surface When Unboxing the Dishwasher?
When unboxing the dishwasher, there may be a layer of food-grade protective oil on the surface. This oil is primarily used to protect the stainless steel surface and provides a high level of protection. It is recommended to rinse this layer off with hot water before the first use.
What is the Noise Level of the Dishwasher During Operation?
The current measurement results of the product are approximately 58 decibels. These data come from our laboratory tests (laboratory test data is for reference only).
What is the Power Consumption of the Dishwasher During Operation?
What is the Difference Between the Dishwasher's Fruit and Vegetable Washing and Market Fruit Purifiers?
Existing fruit purifiers typically have a smaller capacity and mostly remove pesticide residues using ozone. Our product uses ultrasonic (or microbubble) technology, achieving over 90% removal efficiency, providing higher efficiency and effectiveness.
Do Dishes Need to Be Removed After Washing in the Dishwasher?
The dishwasher can kill some bacteria through high temperatures, but if not used for a long time, it is advisable to remove the dishes to prevent new bacteria from growing. You can also wash them again before use to ensure hygiene.
Can the Sink Dishwasher Connect to Hot Water?
If there is a need for both hot and cold water at the sink, you can connect to the home's hot water supply; however, the washing function tank should not be connected to hot water.
What is the Drainage Method of the Sink Dishwasher?
The sink dishwasher drains by its own weight, similar to the drainage method of the sink.
Can a Water Purifier Be Installed Under the Sink Dishwasher?
A water purifier can be installed under the sink, but slightly larger purifiers may not fit. Therefore, the installation space needs to be considered beforehand.
Installation Sequence of the Sink Dishwasher and Water Purifier
If there is sufficient space in the cabinet, it is recommended to install the dishwasher first. If the water purifier is installed first, the dishwasher may need to be removed and moved later. If the water purifier is installed too early and not used for a long time, bacteria may breed inside. Therefore, it is advisable to install the water purifier after moving in. However, if users prefer to install the water purifier first, that is also acceptable.
Installation Method for the Sink Dishwasher
The dishwasher can be installed on the countertop (with the panel above the countertop).
Dishwasher Display Issues / No Response / Dishwasher Not Lighting or Working
- First, press the power button: long press the power button to turn it on.
- If long pressing does not work: please unplug and reinsert the power plug, with a suggested unplugging time of about half a minute. This is similar to restarting a computer; once restarted successfully, the machine's screen will light up or emit a beep.
- If there is still no response: it is recommended to try a different outlet or check if your home power supply is normal.
- If it still does not operate normally after testing: it is suggested to contact a technician for repair, as there may be a problem with the power board or door components.
Can the Sink Dishwasher Sterilize and Disinfect?
The dishwasher’s washing mode uses high temperatures of 70°C (75°C for E5/Z5 mode) for sterilization, similar to the principle of pasteurization. It rapidly heats to the specified temperature and maintains it for about half an hour, effectively killing 99.99% of Staphylococcus aureus and E. coli. However, for further disinfection, it is still recommended to use a professional disinfection cabinet.
Why Are Dishes Not Clean After Washing?
Suddenly Not Cleaning Well:
- Check for Foreign Objects: Check if any foreign objects have fallen into the machine (such as chopsticks, large residues, etc.), as this may prevent the spray arm from rotating. If the foreign object can be directly removed, please take it out; if it is stuck, you will need to disassemble the spray arm for cleaning.
- Check Spray Arm Installation: Ensure the spray arm is correctly installed and check if it is tilted or not securely installed. If there are issues, please reinstall it.
- Clean the Machine: Confirm if the machine has not been cleaned for a long time (such as the filter basket and bottom). If cleaning is needed, clean the filter basket and spray arm, and it is recommended to perform a "Standard Wash" mode cavity cleaning 1-2 times a week.
Consistently Not Cleaning Well:
- Clear Residues: Before washing, please clear residues from dishes and utensils.
- Proper Placement: When placing dishes, it is recommended to tilt bowls downwards and leave gaps between bowls.
- Add Dishwasher Powder: Ensure an appropriate amount of dishwasher powder is added.
- Use "Intensive Wash" Mode: It is recommended to use the "Intensive Wash" mode (except for glass wine glasses).
What are the Installation Conditions for the Sink Dishwasher?
- Installation Location: It should be installed in a stable position for easy operation and maintenance and must not be tilted.
- Power Socket: Avoid installing the power socket in damp or water-prone areas. A separate wire with a diameter of 1.5 square millimeters (16 AWG) or larger and a 10A three-prong socket must be arranged, ensuring reliable grounding.
- Distance from Heat Sources: The installation location must maintain a certain distance from heat sources like stoves.
- Distance from Gas Pipes: When installing the product, it should maintain a distance of more than 30 cm from the gas meter and gas pipes.
- Height of Drainage Pipe: The height of the drainage pipe from the ground should be ≤300 mm (based on an 800 mm countertop); if the cabinet height is 900 mm, it should be ≤400 mm.
- Pipe Installation: During installation, all drainage pipes, power sockets, and angle valves for cold and hot water should be avoided under the functional tank of the dishwasher and can be installed below the sink tank.
Hob
What is the rated power of the cooktop?
The total rated power of the FOTILE EEG75201 cooktop is 4500W, with the left burner rated at 1000W/2200W and the right burner at 2300W.
What is the panel material of the cooktop?
The cooktop features a panel made of German SCHOTT ceramic glass, which has high heat resistance, can withstand high temperatures without deforming, and has a smooth surface for easy cleaning.
What type of heating element does the cooktop use?
It is equipped with original German EGO heating elements, which provide uniform heating performance, ensuring that food is heated evenly and enhancing cooking results.
What are the dimensions and cut-out size of the cooktop?
The overall dimensions of the product are 750 x 420 x 90 mm, with a required cut-out size of 720 x 390 mm.
What safety features does the cooktop have?
It includes multiple safety protection features, such as overheat protection, automatic shut-off, and a child lock, effectively preventing accidents and ensuring safety during use.
Does the cooktop have a residual heat indicator?
Yes, the cooktop is equipped with a residual heat indicator. When the cooktop is still hot, the light will illuminate, reminding users to exercise caution and avoid burns.
Does it support a timer function?
Yes, the cooktop has a timer function that can be set for a maximum of 599 minutes.
What is the power control range of the cooktop?
The power control range is from 1 to 5 levels, allowing users to make precise adjustments based on different cooking needs.
What is the control method of the cooktop?
It uses advanced O-touch touch control, making it easy to precisely control the heat, enhancing the cooking experience.
What is the maximum temperature the cooktop can reach?
The cooktop can reach a maximum temperature of 598°C, meeting various cooking requirements.
What is the voltage requirement for the cooktop?
The voltage requirement is 220-240V.
Does the cooktop support various cookware?
Yes, the cooktop features a dual-ring design, allowing it to support various sizes of cookware.
How should the cooktop be cleaned?
The smooth surface of the cooktop makes it easy to clean. It is recommended to use a soft cleaning cloth and a neutral detergent to maintain its appearance and performance.